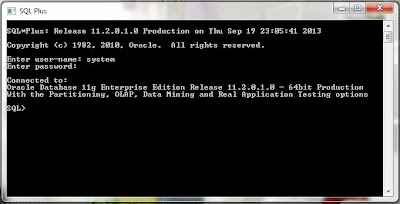
Start - All programs - Oracle - Application Development - SQL Plus. Then Figure 17 will appear.
 |
| Figure 17 |
13. Here you need to insert your user-name and password. The password will not appear in the screen, so, you just need to type the real password. Then if, the installation is settled, the message that appear is
" Connected to :
Oracle Database 11g Enterprise Editing Release 11.2.0.1.0 - 64bit Production With the Partitioning, OLAP, Data Mining and Real Application Testing options".
********************* TO CREATE DATABASE*********************
 |
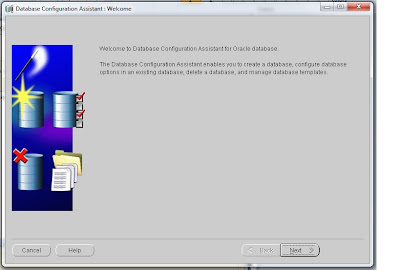
| Figure 18 |
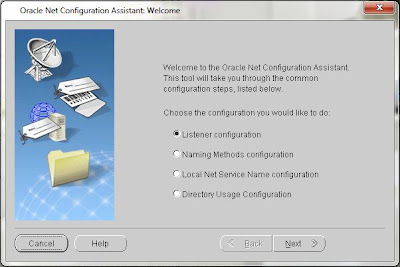
1. Click on Start - All program - Oracle - Configuration and Migration Tool - Database Configuration Assistant. Then, window like in Figure 19 will appear. Click on 'Next' button to proceed.
 |
| Figure 19 |
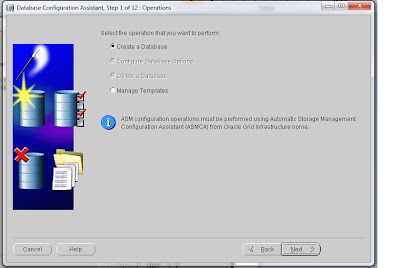 |
| Figure 20 |
2. Tick on "Create Database", then click on 'Next' button to proceed.
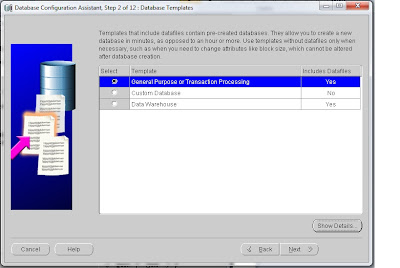 |
| Figure 21 |
3. Tick on "General Purpose or Transaction Processing", then click on 'Next' button to proceed.
if for Oracle 10g, the reason we choose "General Purpose or Transaction Processing" is because we can minimize input required. You can create your database more quickly than with the advanced type. As for Oracle 11g, i cannot find the reason, but i think the reason is the same as in Oracle 10g.
~ For more details, you can read
here and
here. ~
 |
| Figure 22 |
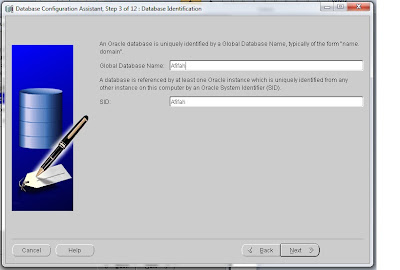
4. Insert any name, then click on 'Next' button to proceed.
 |
| Figure 23 |
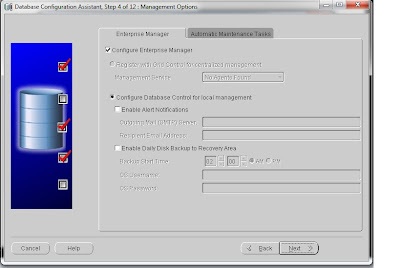
5. Tick on "Configure Enterprise Manager" and " Configure Database Control for local management", then click on 'Next' button to proceed.
 |
| Figure 24 |
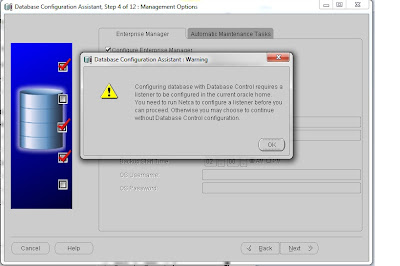
6. If you not add any Listener yet, this pop-up will appear. You have to add Listener first, then you can proceed. For more detail, please refer to "ADD LISTENER" steps below.
 |
| Figure 25 |
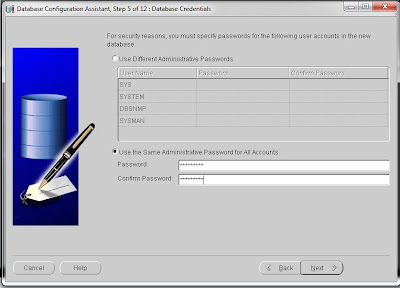
7. After you have add your Listener, Figure 25 will appear. Now you need to create any password and both of them must match. If both passwords not match, Figure 26 will appear.
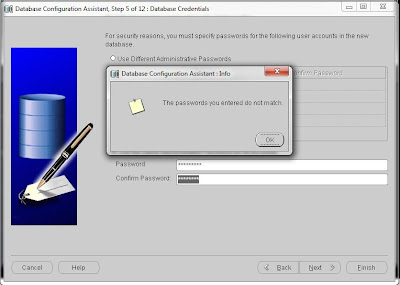 |
| Figure 26 |
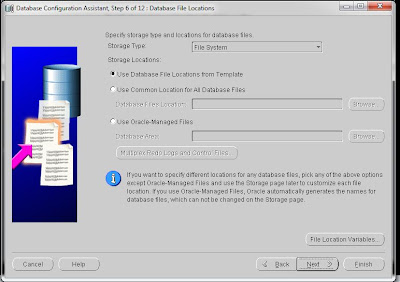 |
| Figure 27 |
8. Tick on "Use Database File Locations From Template", then click on 'Next' button to proceed.
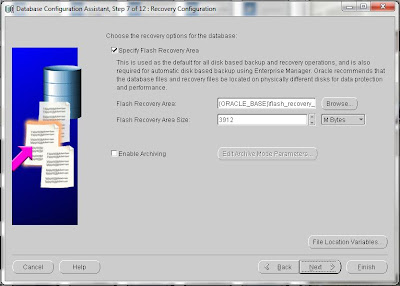 |
| Figure 28 |
9. Tick on "Specify Flash Recovery Area", then click 'Next' button to proceed.
 |
| Figure 29 |
10. Click on 'Next' button to proceed.
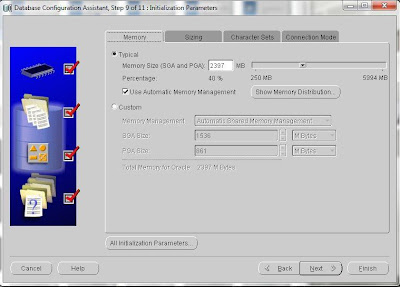 |
| Figure 30 |
11. Tick on "Typical" and "Use Automatic Memory Management", then click on 'Next' button to proceed.
 |
| Figure 31 |
12. Click on 'Next' button to proceed.
 |
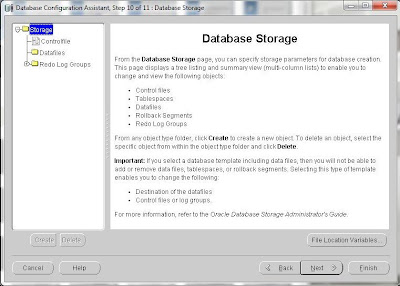
| Figure 32 |
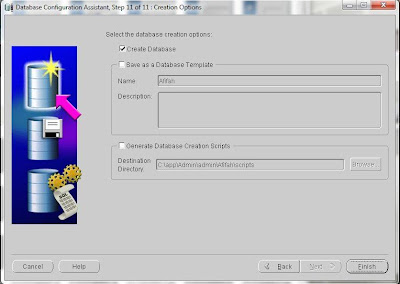
13. Tick on "Create Database", then click on 'Finish' button.
 |
| Figure 33 |
 |
| Figure 34 |
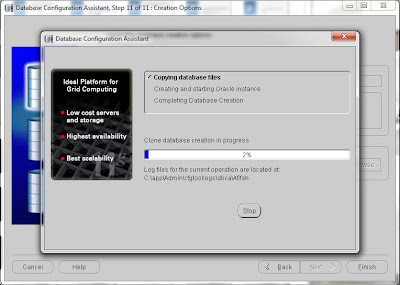
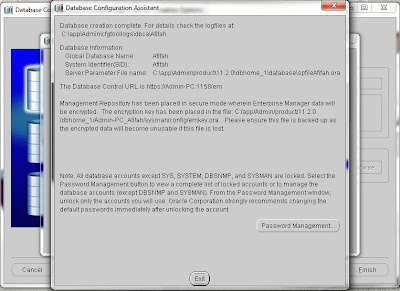
14. After you click on 'Finish' button. Figure 32 will appear, then click on 'OK' button, then window in Figure 34 will appear. You have to wait until window just like in Figure 35 appear. Lastly you will click 'Exit' button. It's mean, your database has been created.
 |
| Figure 35 |
*********************** ADD LISTENER ********************
# From Figure 24, if you do not have any Listener yet, you have to add first before you proceed process of creating database.
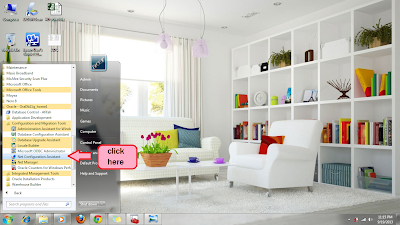 |
Figure 36
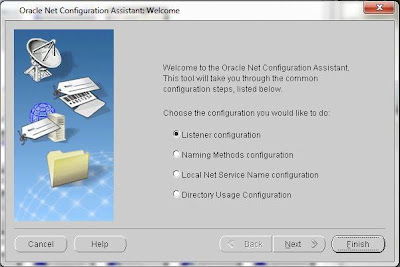
1. Click on Start - All Programs - Oracle - Configuration and Migration Tools - Next Configuration Assistant. Then Figure 37 will appear. Tick on "Listener Configuration", then click 'Next' button to proceed.
|
 |
| Figure 37 |
 |
| Figure 38 |
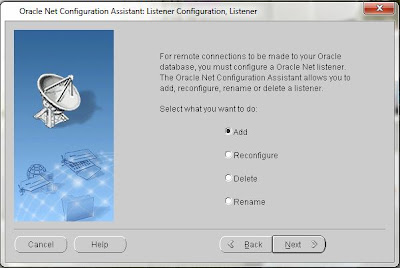
2. Tick on "Add", then click on 'Next' button to proceed.
 |
| Figure 39 |
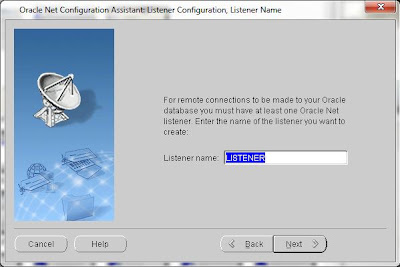
3. You can name the Listener by using any name, then click on 'Next' button to proceed.
 |
| Figure 40 |
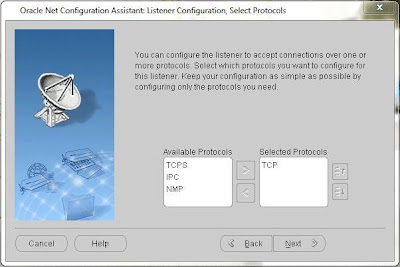
4. Choose the Selected Protocol i.e TCP, then click on 'Next' button to proceed.
 |
| Figure 41 |
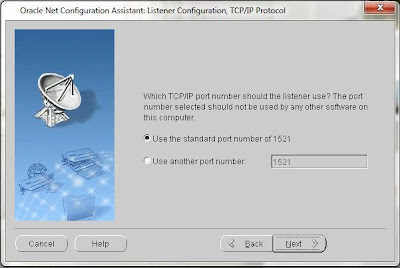
5. Tick on 'Use the standard port number of 1521, then click on 'Next' button to proceed.
 |
| Figure 42 |
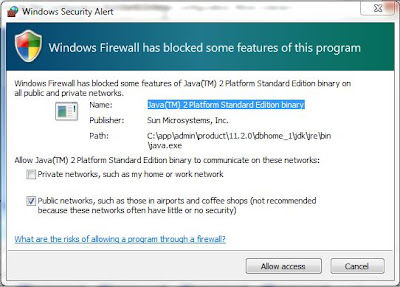
6. After click on 'Next' button in Figure 42, this pop-up will appear. You can choose either "Allow access" or "Cancel".
 |
| Figure 43 |
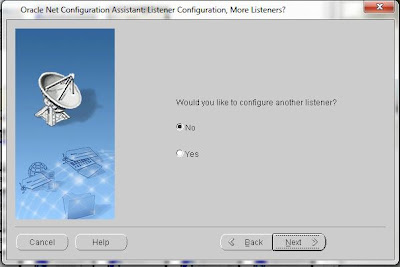
7. Tick on "No", then click on 'Next' button to proceed.
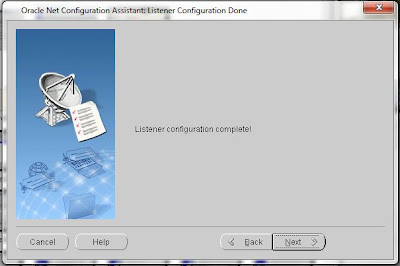 |
| Figure 44 |
8. Your Listener configuration is complete!! Click on 'Next' button to proceed.
 |
| Figure 45 |
9. Tick on Listener configuration, then click on 'Finish' button. Finally the process of adding listener is complete !! =D
***************** CHECKING THE ORACLE 11g ****************
 |
| Figure 46 |
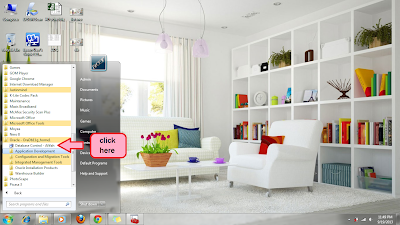
1. Click on Start - All programs - Oracle - Database Control-Afifah
 |
| Figure 47 |
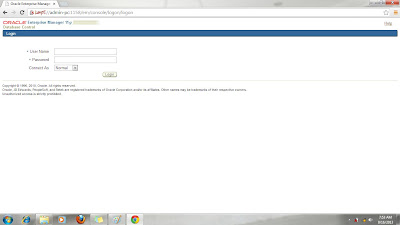
2. Please insert the "User name" and 'Password", then click on 'Login'. The password is based on password that you've created before. Please look at Figure 21 for more detail.
 |
| Figure 48 |
3. After you have success to login, Figure 42 is shown. If the "Status" in "General" shown "Up", it's means, your software is ready to use.
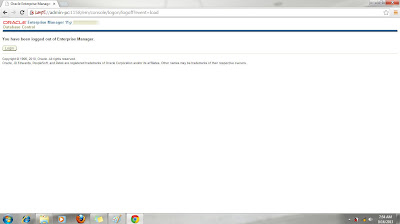 |
| Figure 49 |
4. Finally, if you have 'Log Out', Figure 43 will be shown.
---------------------------------------------------------------------------------------------------------------------------------------
Alhamdulillah, that's all that I can share. Hope this few steps can help anyone.. Thanks =D
There are a lots of website that share everything about Oracle 11g ..
Feel free to drop
here and
here =D.. All the best to those who want to install Oracle 11g..


